SVG 概念及使用
有時候做網頁會想要加上一些小動畫或小圖案,但放上 jpg 圖片或 gif 動圖放大後圖片又會糊掉。這時可以改使用 SVG。
SVG 是向量圖,不像 JPG 或 PNG 點陣圖放大後會一格一格的;此外,在修改顏色、邊線或是製作動畫也能直接使用 CSS 來控制。
<svg> 標籤
畫布,可控制 width、height
可想像成一個 div,內含各種圖形
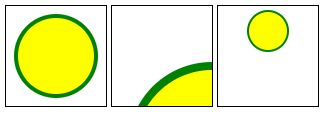
Viewport、Viewbox
viewport 是 svg 圖片的大小,viewbox 是可視範圍,並不會改變內容物的比例
viewbox=”x, y, width, height”
預設 viewport = viewbox
1 | <svg width="100" height="100" style="border: black solid 1px"> |
圖形 Tag
矩形:rect x=x 位置 y=y 位置 rx/ry=圓角(通常 rx=ry) width height
1
<rect x="50" y="50" width="100" height="100" rx="5" ry="5" />
圓形:circle cx=x 位置 cy=y 位置 r=半徑
1
2
3
4
5
6
7
8
9<circle
cx="78"
cy="78"
r="60"
stroke="#f77465"
stroke-width="18"
fill="#f75745"
opacity="0.8"
/>橢圓: ellipse cx=x 位置 cy=y 位置 rx=x 半徑 ry=y 半徑
1
<ellipse cx="200" cy="80" rx="100" ry="50" fill="white" />
直線:line x1=起點 x y1=起點 y x2=終點 x y2=終點 y
多邊形:polygon points=點的位置 x,y 為一組
文字:text x=x 位置 y=y 位置 font-szie=文字大小 text-anchor=對齊點 start | middle | end
1
<text x="50" y="50" font="14" fill="black">Hello!</text>
曲線:polyline points =x1,y1 x2,y2 … polyline 不會封起來,polygon 會
路徑:path d=敘述 D3 中最常使用
1
<path d="M55,0A55,55,0,1,1,-55,0L-45,0A45,45,0,1,0,45,0Z" />
群組:g 中的 Tag 都會繼承 g 的通用 attribute
圖形 Tag 通用 attribute
- fill = ”color” 填滿顏色
- stroke = “color” 邊緣顏色
- strock-width = “number” 邊緣粗細
- stroke-opacity = “0~1” 邊緣透明度
- stroke-dasharray = “4 4” 邊緣虛線,第一個數字為線的長度比,第二個數字為空白處的長度比
- opacity = “0~1” 整體透明度
- fill-rule = “nonzero | evenodd” 填色規則(判斷哪裡是圖案內部的方法)
或是用 style 代入 EX: style = “ fill = blue; stroke = black; opacity: 0.5”
Tooltip
原生 tooltip 可以用 title 產生,將 title 夾在 SVG 圖形中間即可
1 | <rect x={0} y={10} width={100} height={100} fill="red"> |
Import SVG 的方法
- 直接 import 並掛在 img.src 上
1 | import LogoUrl from 'assets/logo.svg' |
- CRA app 內建 SVGR,import ReactComponent
使用 create-react-app 時, 會預安裝 plugin SVGR,能將 SVG 直接 import 成 React Component
1 | import { ReactComponent as LogoIcon } from 'assets/logo.svg' |
- 另外安裝 SVGR,以 vite 為例
vite-plugin-svgr是 vite 用的 SVGR 套件,安裝後加入 vite.config.js
1 | // vite.config.js |
1 | import { ReactComponent as LogoIcon } from 'assets/logo.svg' |
使用 TypeScript 的話,需要在 App.tsx 或會用到此功能的 component 加入 type declaration
1 | /// <reference types="vite-plugin-svgr/client" /> |